July 27, 2023

For me, baking bread with a sourdough starter is a bit like playing golf. You know you can hit that long shot or make that putt, but it doesn’t happen every time. So, you keep practicing. And baking.
Sourdough starter can make so much more than just a loaf of delicious, crusty bread. With the discard (what you take out when you feed the starter), you can make sourdough pizza, pancakes, muffins — the list goes on.
There are as many recipes for starter as there are bread. But an easy one to start with is simply adding equal parts of cool water and bread flour or rye flour and a bit of honey or sugar (to feed the wild yeast). You can also add a few grapes, which don’t add flavor but help capture more wild yeast, which helps the starter ferment. (Toss the grapes after a day.) Mix everything together and let it sit at room temperature until the mixture looks bubbly. This is where patience comes in; it can take several days, depending on the temperature of the room. Warmer room equals faster fermentation.
Once the starter is bubbly and has doubled, feed it with more equal parts flour and water. Keep the starter at room temperature and continue feeding it daily to make it stronger. But at this point, before feeding it, it’s important to discard half — this is your discard that can be used in other recipes — while reserving the remainder.
The starter should have a strong, acidic, sour smell, like very intense yeast. That’s how you know the fermentation is at work. As the starter ages, the odors will become more pronounced. As long as you keep feeding it, it won’t change much, but it will be bubblier. It may have liquid on the surface. That’s nothing to worry about; you can stir it back into the starter if you want a more acidic flavor or pour it off. Then keep feeding daily to regain the pleasant, slightly acidic sourdough smell. The bubblier it is, the more active the fermentation has become.
Ultimately, the starter is ready when it doubles in size within an hour or two of feeding and has a pleasant yeast and sour smell. To be sure, take a small portion of the starter and see if it floats in water. If it sinks, it needs a few more feedings. If it floats, it’s because of the carbon dioxide content, which means it’s active.
The starter at the Hy-Vee bakery, where I worked as a dietitian, was over 100 years old, shared and used at all the stores.
In case this just seems like another project that you don’t have time for, once the sourdough starter is active, you can slow down the fermentation process and reduce the frequency of feedings by storing it in the fridge, or even drying it and keeping it in a sealed bag. In the refrigerator, keep it in an airtight container and feed it once a week (same ratio of equal parts water and flour). If you notice dark liquid forming, discard that first, then feed.
Starters seem to be more forgiving than my golf swing.
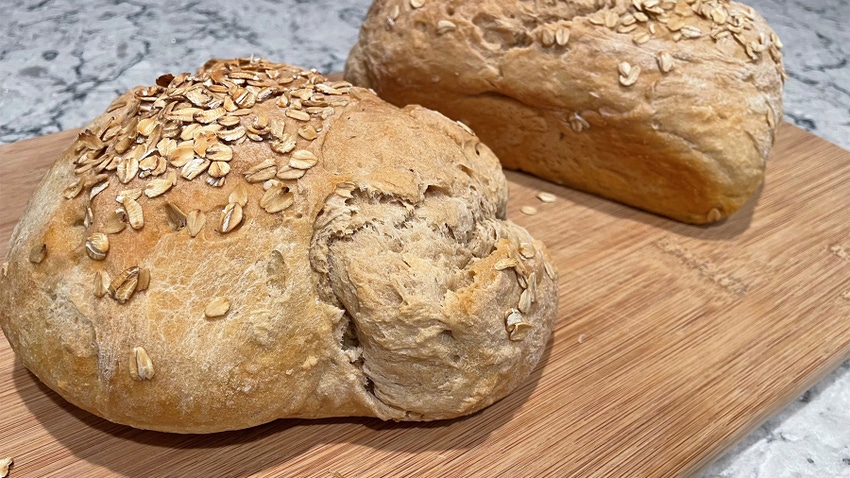
Here’s an easy recipe to get you started making bread with your starter. You don’t have to knead this bread. Simply mix, let rise, fold and shape into your favorite loaf.
Artisan Free-Form Loaf
3 cups lukewarm water
1 tablespoon yeast
1 tablespoon sugar
1 tablespoon salt
½ cup sourdough starter
6½ cups all-purpose flour, or half whole-wheat and half bread flour
Parchment paper and cooking spray
Add the water to a large mixing bowl. Then add the yeast and sugar, and then the salt. Add the sourdough starter. Mix in the flour using a wooden spoon. Add all the flour at once. It isn’t necessary to knead it, just mix. Cover and allow to rise about two hours, depending on the room’s temperature. The dough should double in size. Then refrigerate it and use over the next 14 days. You can use a portion of the dough anytime after the two-hour rise.
On baking day, fold the dough and shape a loaf. Dust the surface of the refrigerated dough with flour so it doesn’t stick to your hands. Shape it, gently stretching it around to the bottom, rotating until the top is smooth and cohesive. The process should take less than a minute. Place on parchment paper or in a greased loaf pan. Spray the top of the loaf with cooking spray, then add seeds or oatmeal to the top of the loaf. Slash the top with a sharp knife to provide a place for steam to escape as it bakes. Bake for 30 to 35 minutes at 400 degrees F, or until the bread reaches 200 degrees with a thermometer. Let cool before slicing.
Store the remaining dough covered in the refrigerator until ready to bake again.
Fargo Ware is a registered dietitian with Southern Illinois University Medical School in Springfield, Ill. Email recipe ideas to her at [email protected].
About the Author(s)
You May Also Like


