Subscribe to receive top agriculture news
Be informed daily with these free e-newsletters

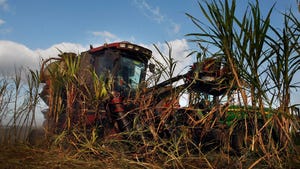
• Whether you have a new or used planter, there are things you can do to achieve peak performance.
March 21, 2013
EDITOR'S NOTE — The Alabama Cooperative Extension System recently hosted a Planter Clinic at the E.V. Smith Research Center in the east-central part of the state. Presenters discussed the calibration and setup of planter units, new metering technology, and the impact of planter performance on crop yields. The following is the third and final installment in a series of articles detailing information from the clinic.
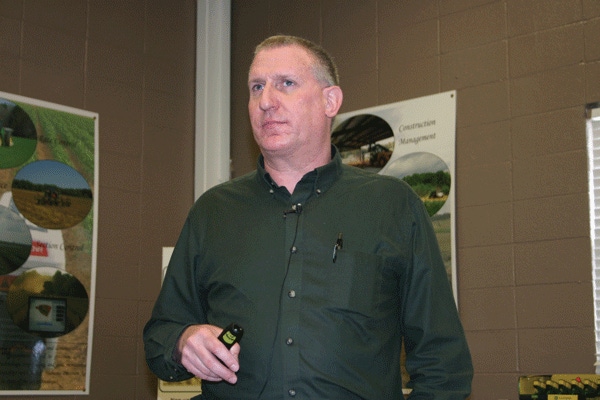
The planter pass, says Bill Lehmkuhl, is sacred, and on average, most farmers have 40 to 50 times in their lives to get it right.
“When I first began conducting planting clinics, most guys spent more time setting their combine than their planter,” says Lehmkuhl, a farmer and consultant with Precision Agri-Services, in Minster, Ohio. “If we don’t get it in the ground the first time, it’s not going to be there when we get to the field with the combine.”
Lehmkuhl, who grows about 1,300 acres of corn, soybeans and wheat, says that as an independent crop consultant, he doesn’t play politics very well.
“What works for one may not work for another,” he says. “I go onto a lot of farms and into a lot of shops, and I see a lot of stuff — attachments piled in a corner. A farmer might have put it on his planter at one time, and it didn’t work, so they take it off and put it in a corner.
“It’s important to try something new, but try it on two or three rows on the outside of the planter. You’ll get a good idea of how something is going to perform.”
Whether you have a new or used planter, there are things you can do to achieve peak performance, says Lehmkuhl.
“If I had a brand-new planter, I’d probably be scared to death. I’d really go through that planter before I took it to the field. I don’t care how green, red or blue your blood runs, they all have their issues, and they all need to be checked very closely before you take them to the field.
Those of you with folding planters should make sure those drives line up perfectly and your hex-shafts are lined up,” he says.
There are good equipment dealers, says Lehmkuhl, and then there are those who want to “hurry it up, set it up, and get it out the door.”
With one new 16-row planter, it took us 10 hours to make the first round around the field because there were so many adjustments that needed to be made. Just because it’s new doesn’t mean it’s ready to go to the field.”
Out of the bag, he says, the yield potential of corn is 300-plus bushels per acre. But from there, unfortunately, it’s all downhill.
“Whenever we put that kernel in the ground, we want to maximize its potential, so we’re focusing on what the planter does to the seed environment. That micro-environment around the seed is critical.
As a crop consultant, Lehmkuhl says one of the biggest problems he sees is stand establishment and emergence. “Whenever we see that first spike coming out of the ground, I want to see all seeds following suit and spiking out of the ground at 24 and 48 hours. That’s when we get good uniform emergence and good stands.”
There are risks, he says, in planting in marginal ground temperature — 50 to 60 degrees — and planting ahead of a cold rain.
“As the cold rain falls on top of that seed, and it takes its first drink, you’re going to have some problems. That cold water will cause shock, and you’ll have emergence issues. So pay attention to the weather and hold back if you need to.”
High yield corn is not in plant population, he says, but in ear count.
“You need to get with your seed guy to know the plant population you need for your variety. If he says you need to be at 34,000, then that’s where you need to be. Everybody pretty much knows their seed-per-acre planting. If it’s set for 36,000, then that’s where we should have 36,000.”
True yield, says Lehmkuhl, comes from ears per acre at harvest. “Let’s assume your seed has 95-percent germination according to the seed tag. The seeds-per-acre planted was 36,000, and hopefully there are 34,000 plants per acre to harvest.
“Ears per acre at harvest should be 34,000. If you take an ear count, and you’ve got only 30,000 ears, you had better start asking yourself why. You’re losing money. We want viable, harvestable, picture-perfect ears.”
If you lose 1,000 ears per acre, that’s 5 to 7 bushels, he says. If you go from 18 to 16 kernels around, it represents a loss of 20 bushels per acre.
“That can happen with early season stress and fertilizer being too close to the seed. It doesn’t matter if you’re on 30-inch rows or 36-inch rows, the goal is to put an ear on every plant.”
Lehmkuhl says growers should not set their planter hitch height on gravel out in the farmyard or on the shop floor.
“Take your planter out to the actual working conditions in the field to set your planter’s hitch height.
“There are a lot of three-point planters in the South. Those of you who are pulling two-point fold planters need to understand where that three-point hitch is going to be.”
The seed tube, he says, needs to be running straight. If you change the pitch and the angle of the seed tube, there will be plant emergence issues.
“If you’re running it downhill, your no-till coulter is going to run too deep, and your closing wheel pressure is lightened. You’ve got to level the planter in the field, and you can’t do it standing still. It has to be done in motion, so you’ll have to have someone helping you.”
The bar should be level across the entire planter, he says. “When you’re out there leveling the planter, if you’re running both conventional and no-till, that is going to change for you as go into the different fields and tillage methods.”
Maintaining proper bar height is also important, he adds. “I want to see 20 to 22 inches between the bottom of your 5-by-7 or 7-by-7 bar when that planter is in the ground. That maintains your parallel bars at a level position and keeps your down-force where it needs to be in an operating zone. It also keeps everything else level.”
If you’re shopping for a used planter, and you walk up behind the row unit and grab hold of it, you should not be able to shake it, pick it up and down, or move it side to side, says Lehmkuhl.
“That might mean it’s time to replace the bolts and bushings. If you waited too long, you might as well go see your equipment dealer and start replacing your parallel bars, or start drilling them out and putting in oversized bushings and full-shoulder bolts.”
Find the center-point of your row, measure out for so many inches, and then measure back to a known point on that row unit, he recommends. Then, make sure those row units are very straight.
People weren’t paying much attention to down-force until the advent of precision planting, he says. Now, growers can know about the down-force on the planter.
“Down-force matters because it’s important in maintaining consistent depth. In addition to that, it’s important in root development. If you plant seed, and the crown roots come out, we’re most concerned with that No. 3 crown root.
“If it doesn’t get out and go deep, you’re in a world of hurt. That’s your pipeline. If you cut it off, you’re hurting your yields. At V4 to V6, you’re determining the number of rows around the ear. We have depth issues when there’s too little down-force.”
Too little down-force, says Lehmkuhl, can affect plant height. “You’ve got a lot of downward forces on the planter — springs and air bags that can do just about anything.
“You’ve also got the upward forces on your planter working against you, and you’ve got speed, row-unit attachments, and the action of trying to get that planter into the ground.”
Growers should consider whether or not their depth settings are equal across the entire planter, that the closing system springs are set the same, and that no-till coulters are set the same, he says. “We’ve got springs and air bags that can do just about anything. If stalks are uniform, we can pretty much tell that everything emerged on time, and that it was planted at a uniform depth.”
Excessive down-force also can result in poorly closing a seed slot above the seed, he says.
“One of the easiest things you can do when you’re out in the field and the planter is in the ground is to go back and grab your gauge wheel. If it spins easily, then you probably need to go ahead and increase down-pressure. But if you can’t make the gauge wheel spin the dirt with all of your strength then there’s probably too much down-pressure.
“If you can barely make it spin in the dirt with one arm, that’s just right. Conditions will change with differing soil types.”
If there’s a central-fill planter in your future, Lehmkuhl advises caution from the standpoint of weight management.
“It’s a wonderful tool, and I know why it’s there, but you don’t need to overload it if you’re planting in marginal conditions. Many growers in the South carry seed alone with no liquid fertilizers, but you need to be aware of what that’s doing to you.”
You don’t need a poly insert on your gauge wheel to keep it from filling with mud, he says.
“You need to make sure the gauge wheels are running very tight up against your seed-opening disks. Grab your gauge wheel and put it in the ‘plant’ position, and then make sure it’s running very tight against the seed-disk openers.
“If you’re planting in dry conditions, the opposite can happen. You’ll have a trail of dirt going down into your seed trench, and you’ll be planting in dry dirt.
“There are different types of gauge wheels on the various planters.”
When seed-opening disks get down to 14.5 inches at the beginning of the season, he says, those blades need to be replaced. New ones are 15 inches.
“You do not want a gap in your seed-disk openers because it will create seed-depth issues. If you’re running standard seed-disk openers, you should have 2 to 2.5 inches of blade contact.
“If you’re running the heavy-duty openers, you should have 1 to 1.5 inch of blade contact. To check that, take a piece of notebook paper, fold it in two, slide it into the top side of your disk, and make a mark. Then, slide it in from the bottom side and make a mark, and measure in between. Check that in multiple locations. It should not go all the way through.”
To check a no-till coulter, take a 2-by-6 or a 2-by-8, put it parallel to your row units underneath the planter, and lower the planter until the double-disk openers make contact.
“When you do that, you had better be able to spin that no-till coulter. It should be 1/4 to 3/8 inch higher than your double-disk openers.”
Turning to residue management, Lehmkuhl says it doesn’t start in the spring when you get into the field with your planting equipment.
“It starts at harvest. It doesn’t matter about the tillage — it starts with the combine and making sure the residue is distributed across the entire width of that machine.
“If we hairpin residue under the seed after planting, and the wind blows for awhile, it’ll dry it down in the seed trench and wick moisture away from the plant, and you could have a late emergence.”
Row cleaners are beneficial for a planter, he says, regardless of the tillage system. “They smooth out the row unit to give your seed metering device a better ride. It also helps to prevent residue from becoming hairpinned in the seed trench, and this is where seedling blight comes from in some cases.”
Looking at a floating versus a fixed-row cleaner, Lehmkuhl says floating row cleaners are more consistent as you go through a field.
“I like to see a floating row cleaner with treader wheels and a straight spike. Manufacturers now offer the ability to adjust row cleaners from the tractor cab. That is very important because most growers don’t want to get out and make those adjustments.”
Seed firmers are important when getting seed down into the bottom of the “V” in a uniform depth, he says.
Several closing-wheel systems are currently on the market, says Lehmkuhl, and many manufacturers have attachments for closing wheels on the back of a planter.
“In heavy clay soils, two spikes can be too aggressive. If the ground is wet and marginal when planting, we can dry it out down to the seed zone.
“If you’re running any type of spiked closing-wheel system, a drag chain is a must. It’s a benefit on any type of closing-wheel system. I’d like to see one spiked and one rubber on a closing-wheel system. On newer planters, you can stagger the closing wheels.”
The closing-wheel bracket, in the back of the planter, should be level or high in the back, especially if you’re running spikes, says Lehmkuhl.
When it comes to planters, it’s all of the little things that ultimately make a difference, he says.
(To see the first article in this series, see Planter Clinic Part 1: Finely tuned planter can't overcome other deficiencies. The second article is at Planter Clinic Part 2: Tuning your planter to maximize yield and profit).
You May Also Like
Enter a zip code to see the weather conditions for a different location.