Subscribe to receive top agriculture news
Be informed daily with these free e-newsletters

Start with disk opener blades and other mechanical parts before moving to electronics and software.

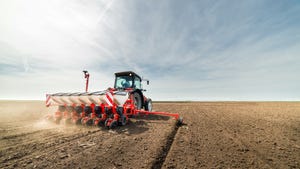
Even with all the modern planters out there, getting the planter ready for the growing season starts with basic ag mechanical maintenance.
Brad Niensteadt, senior product specialist for Kinze, says planter maintenance, even in this age of advanced iron technology, starts with field engagement components, including checking the disk opener blades, tightening bolts and making sure the bearings are in good shape.
Next up is checking the meters. It doesn’t matter how good the planter is if the metering unit isn’t functioning correctly. This can result in skips, doubles or even triples.
Electronics and software updates are two other big things to check, he says. “It’s constantly changing, constantly getting better,” he says of software updates.
The frequency of updates to planter displays are increasing with some manufacturers adding features two or three times a year. These updates are often just fixes to the software or feature enhancements.
Backing up data and adding field or crop changes is also crucial, he says. Cloud-based services can be great because growers can back up their data with a simple push of a button. But these cloud-based services aren’t free, so the other alternative is to back up data to a memory card or USB.
And before you go out to the field, a test pass should be done to make sure everything is functioning correctly. This can be done in the driveway just to be sure everything works before putting the seed in the hopper.
Proper planter maintenance is especially important in no-till, according to Penn State’s Sjoerd Duiker, professor of soil management and applied soil physics.
A no-till planter must plant through heavy crop residue, open a perfect “V” slot, and place seed at equal distance and uniform depth, not to mention having the ability to close the slot so seeds get proper seed-to-soil contact.
Here are some other tips from Duiker on proper planter maintenance:
Clean the meters. Metering units should be taken apart before planting season. Remove dirt and clean the hood with soapy water and replace cracked plastic covers. Replace the broken fingers in a finger-pickup meter.
Use a feeler gauge to check tension on the fingers, then tighten them correctly. Check the backplate and seed brushes for wear and replace as needed.
The belt in finger pickup meters should be flexible, not have cracks and be clean. Use soapy water and let it dry before putting it back in. When putting the metering unit back together, make sure the rubber belt is placed in the right direction. You can lubricate with graphite; don’t use oil or WD-40.
Take your finger pick-up metering unit to a dealer to have it calibrated every 100-150 acres, or every three or four years. A good idea is to take a bag of your own seed with you and give them the correct speed that you’ll be driving.
If you have a vacuum or air meter, check that the vacuum or air pressure is correct, check for leaks and wear on knock-off brushes, and repair or replace as needed.
Planter units. Accurate depth placement can be compromised if planter units are loose or wobbly. You should not be able to easily lift a planter unit or move it sideways.
Look across your planter units and check if they are all the same height. If one unit is either up or down in comparison to the others, then it needs work. A common problem is that some bolts are loose or additional bushings are needed.
Seed opener disks. Seed opener disks need to have a minimum diameter (check your manual) or they will not place the seed at the appropriate depth.
These opener disks also need to come together in the front. One way to check this is to stick two business cards between the openers and move them as close together as possible. If opener disks are worn too much, you will get a ‘W’ shaped seed slot.
Seed tubes. The end of seed tubes can wear to the extent that they can curl inwards, catching seeds.
There is often a hook halfway up that can easily break off. Seed tube guards need to have their minimum width and be fastened correctly, or damage to the seed tube is likely. Also, clean the seed sensors if you have them.
Seed firmers. Seed firmers help to press the seed down into the furrow, guaranteeing more accurate depth placement of the seeds. Adjust the tension of the seed firmer with a bolt. If the seed firmers are worn too much, then they will need to be replaced.
Depth wheels. Depth wheels should run tight against disks. If you need to, change the washers of the depth wheel if necessary. If this doesn’t resolve the problem, the depth wheel arm needs to be replaced.
Coulter diameter. Check the diameter of the coulters and replace them if needed. You should adjust the depth setting of worn coulters that are still usable.
Row cleaners. It’s important to check for wear and replace if it is worn too much.
Closing wheel spring. Closing wheels need to have an intact spring and need to be checked for damage or wear. The bearings cannot be wobbly or too tight.
The bottoms of rubber or cast-iron closing wheels need to be 1.5-2 inches apart. The closing wheel arm can’t have too much play. If so, the bushings or the entire arm may need replaced.
Checking alignment. Here is a way to check the alignment of coulters, opening disks and closing wheels: Take a rope and pull it straight from the front coulter to the closing wheels. The firming wheels, seed openers and coulters should all be in line. The closing wheels should not run on top of the seed furrow.
Insecticide boxes. The insecticide boxes should have no holes or cracks. Tubes should be blown out with air as well as the slot on the bottom of meter.
Fertilizer unit. Fertilizer opener disks should have a minimum diameter (check manual).
The bearings should not be wobbly or too tight.
A good way to check this is to hang a bucket below the tube of the unit and do a test run of 175 feet in the field. Weigh the fertilizer in the bucket, multiply by 100, and you have the amount of fertilizer in pounds per acre (at 30-inch row spacing).
Chains and sprockets. Check all chains and their sprockets. If they are worn or chain links are stiff, they need to be replaced.
Chains need to have the appropriate tension and should be lubricated properly.
Tire pressure. It is crucial to inflate tires to the correct pressure. Incorrect tire pressure can decrease or increase seed population.
You May Also Like
Enter a zip code to see the weather conditions for a different location.