April 4, 2012

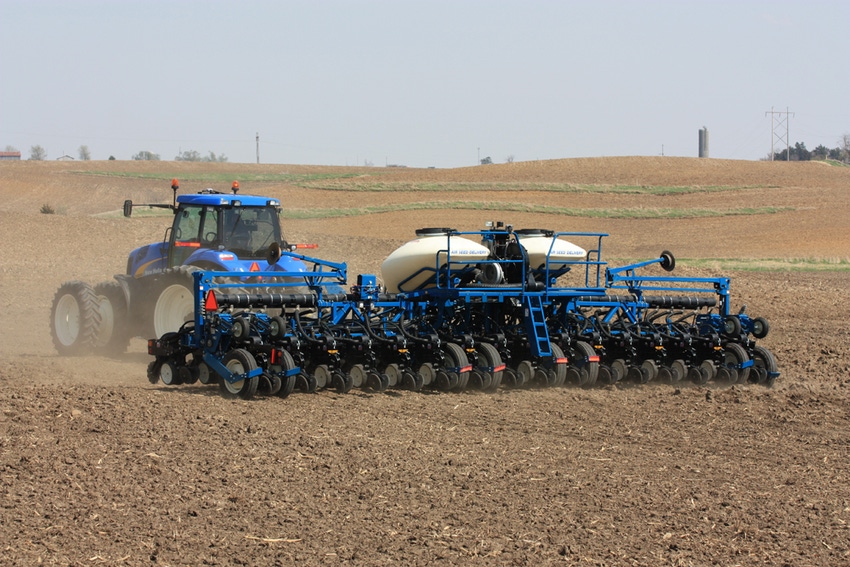
Proper planter maintenance is critical for correctly placing expensive seed into the ground when planting begins. Farmers need to take care of the maintenance now before the planting window opens.
An expert in planter maintenance, service manager Phil Jennings with Kinze Manufacturing offers eight tips for proper planter maintenance:
1. Inspect soil-engaging components. “Consistent planter performance starts with a planter that is in good mechanical condition,” Jennings says. “Make a close inspection of the soil-engaging components on the row units. Badly worn parts must be replaced or planter efficiency will be impaired.”
2. Check disc opener blades. Farmers should check the wear on disc blades and replace 15-inch blades when they are worn to 14.5 inches in diameter. Inspect the disc blade contact, too. “Optimal disc blade contact is 1 to 1.5 inches to form the seed trench,” Jennings says.
3. Inspect inner scraper. The inner scraper should protect the seed tube. “This prevents soil buildup between the opener blades,” he adds. “Replace scrapers when they are worn to five-eighths inch or less.”
4. Check gauge wheels. Look at the gauge wheels for light contact of the tire to blade in the operating position, Jennings says. He also recommends looking over the arm and bushings. Different field conditions can affect the depth adjustment of the planter. “Be sure to check and adjust the depth when field conditions change,” he says.
5. Assess closing wheel performance. Closing wheels must be centered over the seed trench. “Apply only enough down pressure to maintain good seed-to-soil contact,” Jennings says. Closing wheels may be offset slightly for better residue flow, he adds. If the closing wheel plugs with crop residue, the seed trench won’t close properly. An optional closing wheel shield might be needed to help prevent stalks from lodging in the closing wheel arm.
6. Adjust hitch. “Hitch adjustment is another important factor of consistent seed depth, spacing and seed-to-soil contact,” he says. “Adjust the hitch height so the tongue runs parallel to the ground when the planter is in planting position.” The parallel arms of the row unit should be approximately level when the toolbar is 20 to 22 inches above the planting surface. On the planter’s parallel arms, check the bolts, bushings, down-pressure springs and the drive chains to be sure all the parts are performing optimally.
7. Inspect other planter attachments. Inspecting no-till planter parts also is critical to optimizing planter efficiency. No-till coulters should be set at a depth slightly above the disc-opener blades. Residue wheels are intended to move obstacles in the path of the row unit. Residue wheels should be adjusted to just skim the planting surface and may not turn 100% of the time.
8. Conduct full field check. Always confirm what you “think” is happening with a full field check. It is not enough to just dig a few seeds up behind the planter. Jennings strongly recommends a full 1/1,000-acre field check when any settings or adjustments are made. For 30-inch rows, that is a 17.5-foot-row length. Tie up a set of closing wheels and drive ahead at planting speed. “Take the time to prove it to yourself that the job is getting done right,” Jennings says. “The extra 15 minutes is an inexpensive insurance policy. Dirt is the real test.” Farmers then can visibly see all of the critical factors for success, including consistent seed depth, seed spacing, and seed-to-soil contact.
You May Also Like


