Subscribe to receive top agriculture news
Be informed daily with these free e-newsletters

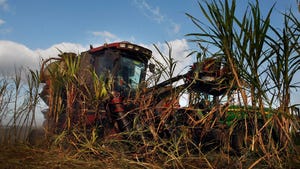
Choosing the right strip-till equipment for your soils and conditions is the key to success with strip-tillage.
July 9, 2008

NDSU has produced a strip-till video and guide to equipment features. See the video at www.ag.ndsu.nodak.edu/abeng/conservation_tillage/striptill.htm.
According to John Nowatzki, NDSU extension machine specialist, says the common components to strip-till rigs include:
Coulter blades cuts through the soil and residue in front of the tillage shank. Coulters need to be spring-mounted to allow movement over stones. Some manufacturers are using fluted coulters designed with depth-control features.
Residue managers clear crop residue away from the tilled strip. They usually are mounted a few inches in front of the coulter blade to move the crop residue which allows the coulter to penetrate the soil. Some manufacturers mount the row cleaners behind the coulter and just in front of the tillage shank.
Tillage shanks penetrate and loosens the soil and can be designed with a fertilizer injection tube so gaseous, liquid or dry granular fertilizers can be applied with the strip-tillage operation. Tillage depth is dependent on the type of soil and conditions and the specific crop that will be planted.
Berm-building disks are mounted on each side of the tillage shank and 6 to 8 inches behind the shank. The disks can be mounted to mound the strip to promote moisture runoff and facilitate soil drying in the spring, or to create a slight depression in the soil to catch snow and rain to increase soil moisture for next year's crop.
Conditioning baskets are mounted behind the shanks to break soil clods and smooth the soil. Some manufacturers use rubber wheels instead of packing wheels, but some way of smoothing the soil and breaking lumps is important on strip-till equipment.
Source: NDSU Extension Communications.
You May Also Like
Enter a zip code to see the weather conditions for a different location.