Subscribe to receive top agriculture news
Be informed daily with these free e-newsletters

The mechanics of pulling soil samples matters.
Garbage in, garbage out. If that old axiom applies anywhere, it applies to soil sampling. Your soil test results are only going to be accurate if you take time to follow proper procedures when pulling cores and preparing samples.
Chris Parker has pulled many soil samples in his day. A retired Morgan County ag educator, he maintains a small livestock, grain and timber farm, and pulls his own soil samples. He suggests following these six steps to obtain meaningful soil test results.

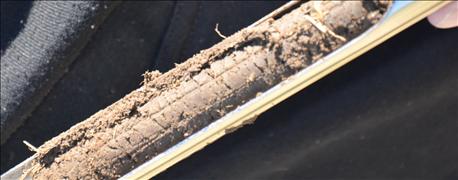
TAKE SEVERAL CORES: Pull several cores like this one from each sampling area to get a representative sample.
1. Determine soil sampling areas before you begin pulling soil cores. Some people pull samples on a grid determined by GPS. Others sample by soil type. Still others use a combination of grid sampling and sampling by soil type. Parker tends to pay attention to topography of the field. “If there is a higher part and a lower part in the field, I tend to sample one area first, and then pull a separate sample from the other area,” he says. “If the topography is different, there is likely a difference in soil types, too.”
2. Limit the size of the area that one sample will represent. Parker prefers to include no more than 4 to 5 acres in one sampling area. So in a 20-acre field, he might pull four to five separate samples. If you sample by soil type, some of the areas may be smaller than 4 or 5 acres. Those who sample by grid typically set up grids to represent anywhere from 1 to 2.5 acres per grid.
3. Pull eight to 10 cores per sampling area. Parker pulls numerous cores randomly as he walks over the sampling area. He mixes the soil together and then fills a sample.
“Marking sample bags correctly is also important,” Parker says. He typically marks the bags before he fills them. He either marks them by field if he is sampling small fields, or uses some designation system that he can interpret once he gets the results. If it’s a field that has been sampled before, he recommends numbering and identifying the samples the same way each time.
4. Use a plastic bucket when pulling cores and mixing soil. Using a plastic bucket to mix cores is Soil Sampling 101, Parker says. If you use a metal bucket, contaminants from the bucket could affect sampling results. Make sure the plastic bucket or pail is clean each time you use it.
5. Stay away from field borders and areas that might not be representative of a field. Since you want the most representative sample possible, Parker suggests staying away form end rows and field borders. If you are sampling in a field next to a livestock operation, make sure the area where you sample isn’t affected by manure runoff.
6. Pull cores at the same depth, and sample at the same time each year. Consistency matters when it comes to soil testing. If you pull samples in the fall one year, pull them in the fall the next time you sample, Parker advises. And if you’re pulling 8-inch cores, mark the probe to make sure you get an 8-inch core every time.
You May Also Like
Enter a zip code to see the weather conditions for a different location.