Subscribe to receive top agriculture news
Be informed daily with these free e-newsletters

Learn how to manage lower-quality corn coming from fields this fall.
October 16, 2020

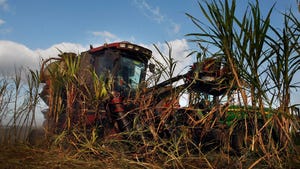
Grain damage resulting from the August derecho storm is widespread and highly variable in Iowa this fall. The windstorm flattened many cornfields and left stalks lodged and tangled. This year’s drought also weakened stalks and resulted in downed corn. Iowa State University Extension has put together a list of practices farmers should consider this fall for good grain management, especially when working with suboptimal quality grain.
“If distressed grain coming from these fields is dried slowly or held too long as wet grain before drying it, chances are you will see mold developing,” says ISU grain quality specialist Charlie Hurburgh. “Maybe even continued development of the field fungi that create toxins. So you want to get the grain dry and cool, and clean. It’s very important to take the center core out of bins after you fill them. That’s because these softer kernels in lower-test-weight corn will break up as you handle the grain and fill the bin. You’ll have a lot of fines in the grain in the center of the bin. You need to remove that center core of grain after filling the bin.”
“You need to check this grain more frequently during storage,” says Hurburgh, who is director of the Iowa Grain Quality Initiative at ISU. He, along with ISU Extension ag engineering field specialists Shawn Shouse and Kristina TeBockhorst, offer the following considerations and recommendations.
1. Know your grain quality. Information on grain quality factors is essential to know the level of risk with attempting to store this grain. Molds, test weight and high variability in quality may be issues.
Test weights could be low, as storm damage hindered photosynthesis and grain fill. Low-test-weight grain will have reduced storability. Test weights near 45 pounds per bushel or lower will have a severe storage risk and extremely limited market potential;. Avoid picking this light-test-weight corn grain up with the combine or letting it enter the tank.
Mold growth is a concern in drought-stressed and wind-damaged grain. Some molds can produce toxins under the right conditions. Mold and toxins should not get worse in storage if corn is properly dried and cooled (corn dried to 15% or less moisture content and cooled with aeration immediately). Stored grain needs to be continually monitored and properly aerated.
Quality is an insurable factor but needs to be adjusted for by the insurance company before entering into storage, the elevator or the point of sale. With severely damaged grain, determine if a buyer exists and what the discount is. The buyer will ultimately dictate acceptance and pricing.
Ask your insurer what quality factors (test weight, damage) and perhaps feed safety factors (mycotoxins) will be considered in their adjustment. Get another (repeat) adjustment if quality changes out in the field.
Sample from a representative area just before or at harvest. Grain quality can change under certain weather conditions or with enough time between sampling and harvest.
At-harvest samples from the combine’s grain tank are preferred. Ideally, to get a representative sample of the grain quality, a sample should be collected from a stream of grain, such as from the combine unloading auger into a wagon. Use a PVC pipe sampler or a large canister (a coffee can works well) on a pole or stick to sample all the way through the stream of grain three to four times. Ear samples are not recommended.
Tests are usually sufficient at local grain elevators for test weight, moisture content and perhaps damage. For toxin testing, send your sample to a Federal Grain Inspection Service-licensed lab. Be sure you have a large enough sample for the test.
2. Dry quickly when quality is low. High-temperature drying is recommended over low-temperature or natural air drying when quality is poor and storage life may be greatly reduced. Drying faster will minimize the risk of the grain spoiling before it dries.
For high-temperature dryers, use the max drying temperature that doesn’t damage the corn to increase energy efficiency and drying speed. Use the higher end of drying temperatures for in-bin dryers as well.
If damage from the high-temperature dryer is observed (discoloring, wrinkling, blistering, seed coat damage), the drying temperature may need to be reduced. For damaged corn, a maximum temperature of around 160 degrees F may limit additional damage.
Dry low-quality corn to 1 to 2 percentage points less than the recommended moisture contents for high quality corn. Avoid drying too far below 15%, as this may increase broken corn and foreign material (BCFM) content and reduces the pounds of salable material.
Dry as soon as possible after harvest and don’t hold wet grain long before drying it. Low-temperature drying systems should be limited to good quality, 21% moisture content or drier corn, with at least 1 cfm per bushel airflow rate.
3. Cleaning, coring and cooling are essential. Keep the poorest-quality grain separate from better-quality grain; do not blend differing qualities. Manage mixed-quality grain based on the worst condition present.
Coring bins will be essential to remove light grain, fines and damaged grain particles that are potentially molded and accumulate in the center core of the bin. Toxins are normally much higher in the fines and core as well.
You “core” the bin by removing about half the peak height, making an inverted cone or W-shape on the grain surface. Leveling the grain surface will also improve aeration and cooling, helping maintain uniform temperatures and quality.
Get grain cooled to below 40 degrees F as soon as possible. If outdoor temperatures are still high at harvest, cool the grain in cycles with every 10- to 15-degree fall in average outdoor air temperatures and run the fans during cool, dry nights. Pay attention to the air dewpoint temperature when cooling, as low dew points indicate good conditions for cooling.
The time it takes to cool an entire bin depends on the airflow rate per bushel. A large drying fan (1 cfm per bushel) will take 15 hours or so, while a smaller aeration fan (0.1 cfm per bushel) will take at least 150 hours (close to a week).
4. Check grain often and aerate for even temperatures. Check low-quality grain in storage more frequently through the winter, or weekly. Check for any indications of mold growth starting to build up in the grain.
Smell the first flush of air through the grain for off-smells or odors (musty or sour). The amount of time for this first flush to exit the grain with a large fan could be less than one minute, so two people may be needed to do this.
Use a handheld carbon dioxide sensor for early detection of grain spoilage; run fans and place the sensor in the exhaust air (out of the top of the bin, generally). Models run from $50 to $500, with many good options for $100 to $150. Consider getting a sensor with an appropriate operating range that includes cold winter temperatures.
When you locate a bin with CO2 concentration above 600 ppm and increasing from week to week, use aeration fans during proper weather conditions. When concentrations rise above 1,500 ppm, the grain should be removed within the next few weeks.
Aerate intermittently to keep grain cool (30 to 40 degrees or less) and temperatures even throughout the bin. Cover the fan openings when the fans aren’t running.
5. Don't count on long-term storage. Do not attempt to store low-quality grain more than three to five months or past this winter. This is grain with low test weight, mold damage, grain with higher CO2 levels during the storage period, or grain not stored at sufficiently low moisture content.
Use test weight as an indicator of which grain to sell first or to keep. Allowable storage time is definitely reduced in low test weight grain. Test weight below 52 pounds per bushel may have only about half the allowable storage life of good quality corn grain, based on recent anecdotal findings from years with poor quality grain.
Use CO2 readings as a real-time indicator of the storage life remaining for the grain.
Aerated storage is preferred over unaerated temporary storage practices such as poly-plastic grain bags or unaerated covered piles. If harvest conditions are favorable, it may be possible to harvest corn dry out of the field. In this case, bags and on-farm piles are less risky, especially if filled fast on cold days to have an even and cool temperature for the grain.
Additional resources are available:
You May Also Like
Enter a zip code to see the weather conditions for a different location.