Subscribe to receive top agriculture news
Be informed daily with these free e-newsletters

Fields that show signs of these diseases should be harvested first.
October 1, 2019

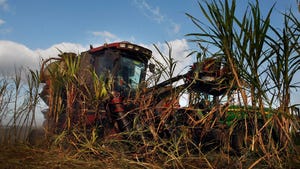
As cornfields reach maturity and harvest begins, it’s time to check for stalk and ear rots. Fields that have these problems need to be harvested first. “As you schedule fields for harvest and prepare bins for grain storage, scout your cornfields,” advises Alison Robertson, Iowa State University Extension plant pathologist.
Stalk rots cause damage and yield loss in many fields across Iowa and other states each year. Identifying disease issues at harvest can help farmers be better prepared to select hybrids to plant for the coming year.
Depending on location, stalk rot organisms may include anthracnose, gibberella, diplodia or fusarium, all of which can survive in corn residue. Stalk rots can reduce corn yield by killing the plant before it reaches full maturity. They can also cause plant lodging, increasing harvest losses and slowing harvest progress. If ears from fallen plants come in contact with the ground for an extended period, grain quality may also be reduced.
“The wet conditions earlier this growing season have many folks concerned about crown rot and stalk rots,” Robertson says. “Stalk rot is more common when stressful conditions, like severe foliar disease or cool and cloudy weather, have limited photosynthesis and the corn plant has cannibalized the sugars in the stalk to fill grain. This causes the corn plant to be more susceptible to stalk rot pathogens since these pathogens are opportunistic.”
Premature death of corn plants is often an indication of crown or stalk rot. “Remember, like most diseases, symptomatic plants will occur singularly or in small groups, and disease severity will range from minimal to severe,” she adds.
It’s recommended to start scouting fields for signs of stalk rot around physiological maturity (when the black layer forms in corn kernels). When scouting for stalk issues, use the pinch test or the push test method. With either of these methods, check approximately 100 plants randomly throughout the field.
For the pinch test, pinch the lower part of the stalk. If it collapses, it fails the pinch test. For the push test, push the cornstalk forward about 8 inches (30-degree angle) and release. If the plant doesn’t spring back to its upright position when released, it fails the push test.
“If greater than 10% of the plants fail the pinch test or the push test, it may be prudent to schedule the field for an early harvest,” Robertson says.
Robertson has received several questions about entire fields dying from the top down due to anthracnose top dieback, which may indicate anthracnose stalk rot. However, it is extremely rare for a disease to occur across an entire field, she says. A situation like this is more likely to be a characteristic of the hybrid maturing.
This year, physoderma has been very widespread, she says. Physoderma brown spot affects corn leaves, but on some hybrids, physoderma can cause node rot that leads to lodging. Node rot is easy to recognize. It usually occurs at Node 7, although other nodes may be affected. When gently pushed, the plants will snap and break cleanly at the node, which will be rotted.

The pathogen can survive for several years in the soil, she notes. Frequent, heavy rainfall from V3 through V8 growth stage of corn favors infection. Hybrids appear to vary in their susceptibility to node rot and Physoderma brown spot.
Some ear rots produce mycotoxins, so it is important to get the grain out of the field, and dried and cooled as soon as possible to prevent growth of the mold and production of mycotoxins, Robertson says. Consequently, cornfields should be scouted at maturity to assess the prevalence and type of ear rots.
Checking for ear rots can easily be done in conjunction with scouting for stalk rot issues. At several random locations in the field, peel back the husks and assess for ear molds. If greater than 10% of the ears are moldy, the field should be scheduled for an early harvest.
“I’ve seen, read and heard reports of a lot of insect damage to ears this growing season,” Robertson says. “Ear rots are often associated with insect injury.”
Ear rots are often identified based on their color. In the 2019 growing season, ear rots are pink, white, green, black and blue-green.
Below is information from the Crop Protection Network that describes ear rots and their identification based on color and where they occur on the ear:
Fusarium ear rot. White to pink mold scattered around the ear is common. This one is of most concern since it produces a mycotoxin called fumonisin.
Diplodia ear rot. This dense white mold usually starts at the base of the ear.
Trichoderma ear rot. A green mold forms between the kernels.
Penicillium ear rot. A green-blue powdery mold forms in between the kernels near the tip of the ear. Affected grain should be tested for mycotoxins.
Cladosporium ear rot. Dark-green or black powdery mold is found between the kernels, with black streaks on the kernels.
You May Also Like
Enter a zip code to see the weather conditions for a different location.