April 1, 2005
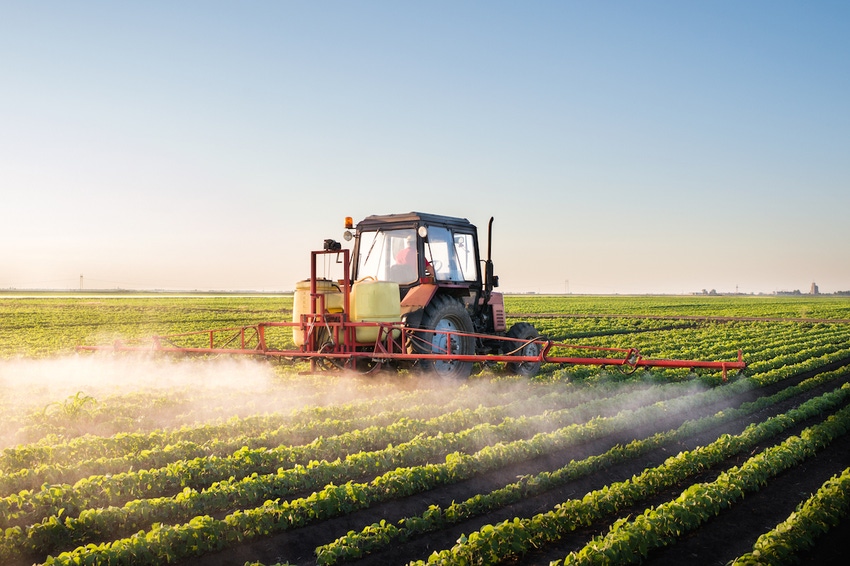
Inaccurate sprayer settings could be costing you big bucks in chemical costs — up to $2/acre/application, according to Erdal Ozkan, agricultural engineer for The Ohio State University (OSU).
Farmers can't afford to make costly errors, says Ozkan. “Farmers do a pretty good job of applying the right amount of product eventually,” he says. “But if they're not calibrating before they start, they're getting there by trial and error. By making adjustments as they go, it's taking them the first tank load to become efficient — that's a costly mistake.”
Ozkan says with concerns about multiple sprays for Asian soybean rust, and anticipated insect pressures, spraying and sprayer calibration has become more important to the bottom line than ever.
“If you change speed, nozzles, pressure or the tractor, any of those factors will change the application rate,” he says. “If we put on all new nozzles to spray for rust, we need to calibrate to make sure we're putting on the correct amount right from the start.”
There are several ways to calibrate a sprayer, but they all require three types of measurements: travel speed, nozzle output and distance between nozzles. Here is a common and simple calibration method, says Ozkan.
Step 1: Fill your tank at least half-full of water to simulate field conditions. While filling, measure the distance between two nozzles. Use this measurement to find the appropriate distance to time your travel speed using the chart above.
Step 2: Mark the distance with flags, between fence posts or other easily identifiable sign. A tape measure capable of measuring farther than 200 ft. will make this step easier.
Step 3: Time the distance between flags with a stopwatch.
It's important you time the sprayer at your intended application speed, starting and stopping the stopwatch as the same point on the sprayer crosses each flag, says Ozkan.
The timing needs to be precise or your calibrations will be off, he notes. Repeat this step and average the times to get a more accurate calibration.
“One time just won't do it,” says Tom Weiler, a farmer from Cardington, OH. “Getting an accurate travel speed by yourself is the toughest part of calibration. I time myself in both directions several times and average them out.”
Step 4: With the sprayer parked, catch the output from each nozzle in a container marked in ounces for the same number of seconds it took to drive in step three.
“This is an integral part of any calibration method,” says Ozkan. “Collecting samples from each nozzle is one way we can determine if our actual gallon-per-acre rate is the same as our intended rate.”
Step 5: Allow the foam to settle and then record the measurement from each nozzle.
“Record from the top of the liquid excluding the foam,” says Ozkan. “For a more accurate measurement, take the reading from a flat surface at eye level.”
Once you've taken measurements from all the nozzles, compare the output from each nozzle with all the others. If one is considerably lower, check to see if it's plugged.
A gentle cleaning with a small brush may be enough to unplug the nozzle. However, if any one nozzle's output deviates from the manufacturers' guidelines (found in their catalog) by more than 10%, the nozzle should be replaced.
Once satisfied with the output of all the nozzles, calculate the average flow rate of the nozzles in ounces. The ounces captured per nozzle equals the gallons-per-acre application rate. Here's how it works: 1 oz. equals 1/128 gal. The distance measured in step two is 1/128 acre for your sprayer size. Therefore, the ounces from each nozzle will equal your gallons-per-acre application rate.
Next, compare the actual application rate (collected from the nozzles) with the intended application rate. If the difference is greater than plus or minus 5% of the intended rate, you'll need to do some adjusting.
“For example, if your goal is to spray 20 gal./acre, the error margin is 1 gal./acre. So if the actual application rate is between 19 to 21 gal./acre, you've achieved the proper rate,” Ozkan says.
Changing pressure or travel speed are two ways you can reduce application error. Or you can change nozzles if the application error is too great. Lowering the spray pressure will reduce the spray delivered; higher pressure means more spray is delivered. Conversely, lower travel speeds will increase the amount of spray delivered; higher speeds will decrease it. Get formulas to determine appropriate adjustments.
If you've made any adjustments to nozzles, pressure or speed, Ozkan says you must repeat the calibration process starting at step three.
Step 6: Set boom height according to manufacturer's specifications for the appropriate target height.
“The uniformity of chemical distribution in the field is as important as the amount applied per acre,” says Ozkan. To achieve uniform coverage you need proper nozzle overlap across a swath, he says.
“Proper overlap will be affected by the angle of the spray pattern coming from the nozzle; by the choice of nozzles which have different spray angles; nozzle spacing; and the distance between the nozzles and the target,” Ozkan says. “Nozzle manufacturers' catalogs indicate the correct overlap margin and boom height for a given nozzle spacing.”
Step 7: Use a portable pressure gauge to determine the pressure at the nozzle tip.
“Flow rate and droplet size can change if there's too much pressure drop between the pump and the nozzle,” says Ozkan. “Your goal should be to have a pressure drop of no more than 1-2 psi from the pump to the nozzle. Beyond 3 psi you'll need to make adjustments.”
A larger pressure drop can indicate that hoses are too small, fittings are restricting flow or too many nozzles are being fed from one hose. You should test the end nozzles on each section of hose. The nozzles farthest from the pump are most likely to show a pressure drop, says Ozkan.
To test his calibration skills, Weiler takes his calibration one step further. After he goes through the above steps, he mixes a precise amount of solution and sprays a small field where he's certain of the exact size to make sure he's got it right.
“Calibration is just part of doing the job,” says Weiler. “I calibrate my sprayer for several reasons — economics, getting along with my neighbors, protecting the environment and the pride of doing the job right.”
What You'll Need
A tape measure. (One measuring at least 200 ft. will be helpful.)
A stopwatch or watch indicating seconds.
Flags or other distance markers.
A container marked in ounces.
A portable pressure gauge.
Pen and paper.
Calculator (optional, but handy).
Driving Distance For Ounce Calibration Method
Row Width or Nozzle Spacing (in.) | Driving Distance (ft.) |
|---|---|
40 | 102 |
38 | 107 |
36 | 113 |
34 | 120 |
32 | 127 |
30 | 136 |
28 | 146 |
26 | 157 |
24 | 170 |
22 | 185 |
20 | 204 |
18 | 227 |
16 | 255 |
14 | 291 |
Prevent Drift
A device that measures wind speed should now be standard equipment on every farm. EPA requires that an applicator record the wind speed and direction at the time of application.
Most farm stores or supply companies such as Gemplers or National Safety Products, Inc. sell wind speed monitors. They cost anywhere from $20 to $300 depending on extra features.
“At 15-30 mph it's easy to tell that it's too windy to spray, but at 4-5 mph or less, that's hard to detect. My wind speed monitor takes the guesswork out of it,” says Tom Weiler, Cardington, OH.
Two major factors affect drift — wind speed and droplet size. Get more in-depth information about factors affecting drift, including tables showing how far different size droplets will travel at certain wind speeds.
Another way to record possible drift is to stake water-sensitive papers in the fenceline adjacent to the field you're spraying, says Erdal Ozkan, agricultural engineer for The Ohio State University. If you see drops on the paper, there's drift. The 2×3 in. papers are available in some farm supply stores and at www.gemplers.com. They cost about $40 for a package of 50 sheets.
Wallet Guide To Sprayer Calibration
Using The Ounce Calibration:
Use chart (on page 8) for distance to drive in field.
Use nozzle spacing for booms. For directed and band rigs use the row spacing.
Set throttle for spraying and operate all equipment. Note seconds required to drive measured distance.
Catch spray for the noted time in Step 2 in container marked in ounces. (baby bottle or measuring cup). If boom, catch spray from one nozzle during noted time. On directed rigs, catch spray from all nozzles per row for noted time.
Nozzle or nozzle group output in oz. = gal./acre actually applied.
Repeat for each nozzle to assure uniform distribution.
Source: The Ohio State University
About the Author(s)
You May Also Like

